Commanders,
You can’t have Armored Warfare without Armor – indeed, each vehicle’s thick hide is one of the key elements of the game and to know each tank’s weakspots is an essential skill to have for advanced players. Many heaviest vehicles only have a few weakspots and it’s important to learn them all in order to be able to defeat them in battle.
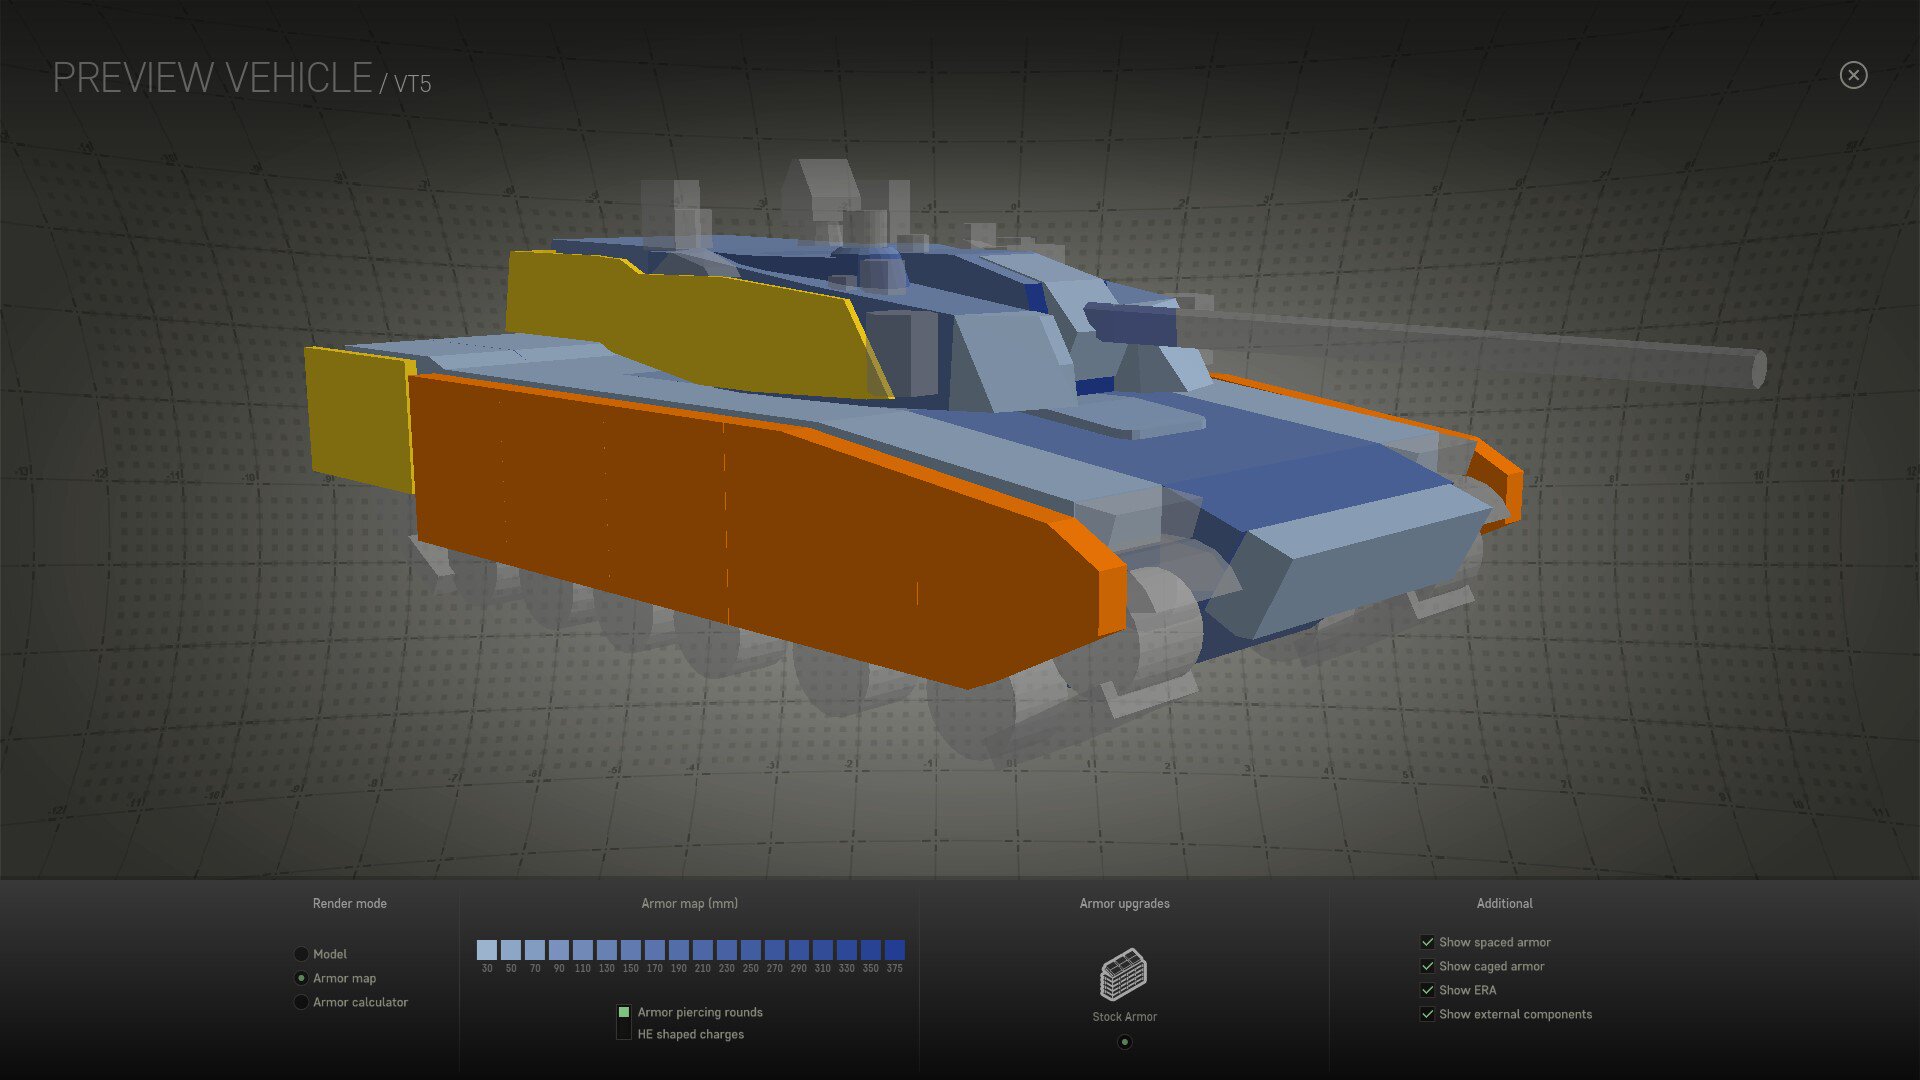
We are currently developing a system that will allow players to inspect the details of vehicle armor, including:
- Angle
- Thickness
- Composition
We call this system Armor Viewer. The Armor Viewer system (accessible in the Garage) consists of three basic modes:
- Visual Model
- Basic Armor Mode (also called Armor Map)
- Advanced Armor Mode (also called Armor Calculator)
In the Visual Model mode, players can see the vehicle as it appears in the garage – the visual model. If a vehicle has one or more armor upgrades, players can select each of them on the bottom of the screen. This mode serves as a baseline for players to know what they are looking at.
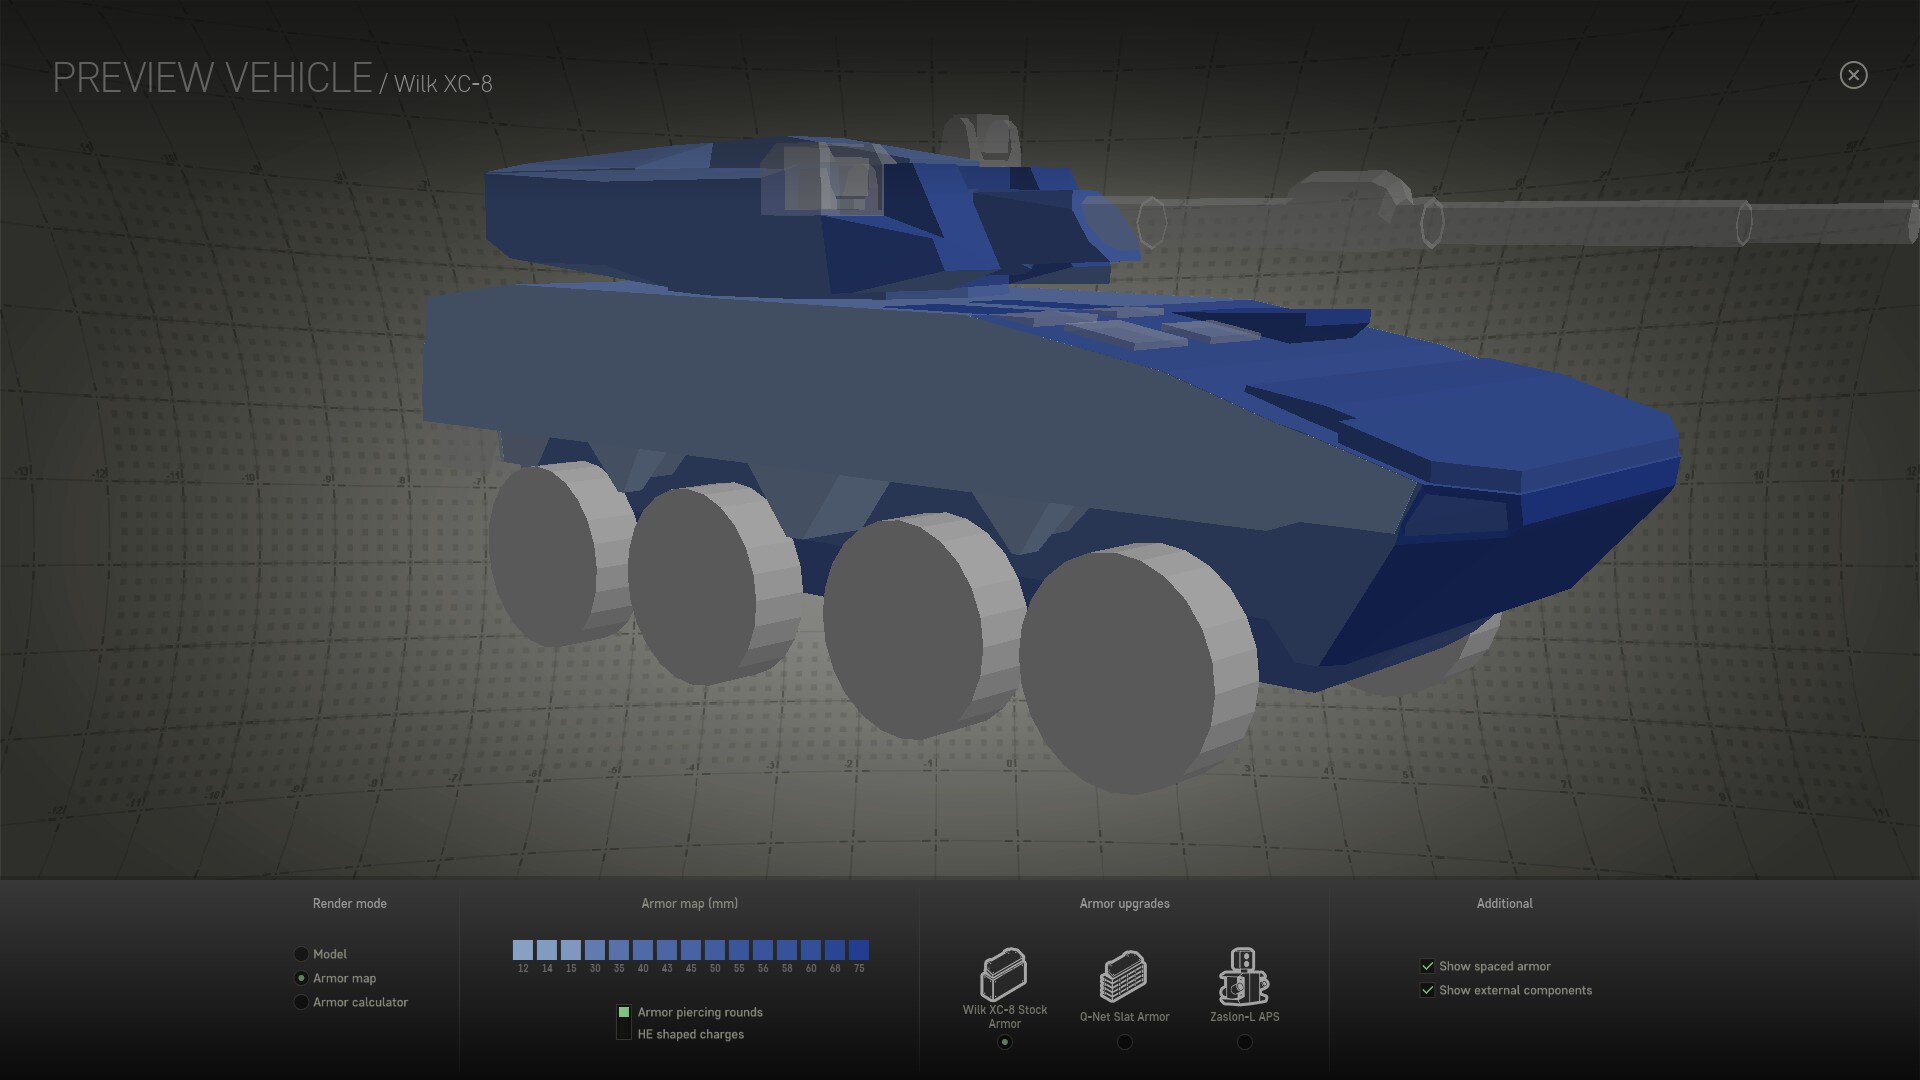
In the Armor Map mode, players can see the vehicle’s armor – its layout, composition and thickness. The armor is represented by a relative color scale consisting of shades of blue – the thinnest armor is light blue, the thickest armor is dark blue.
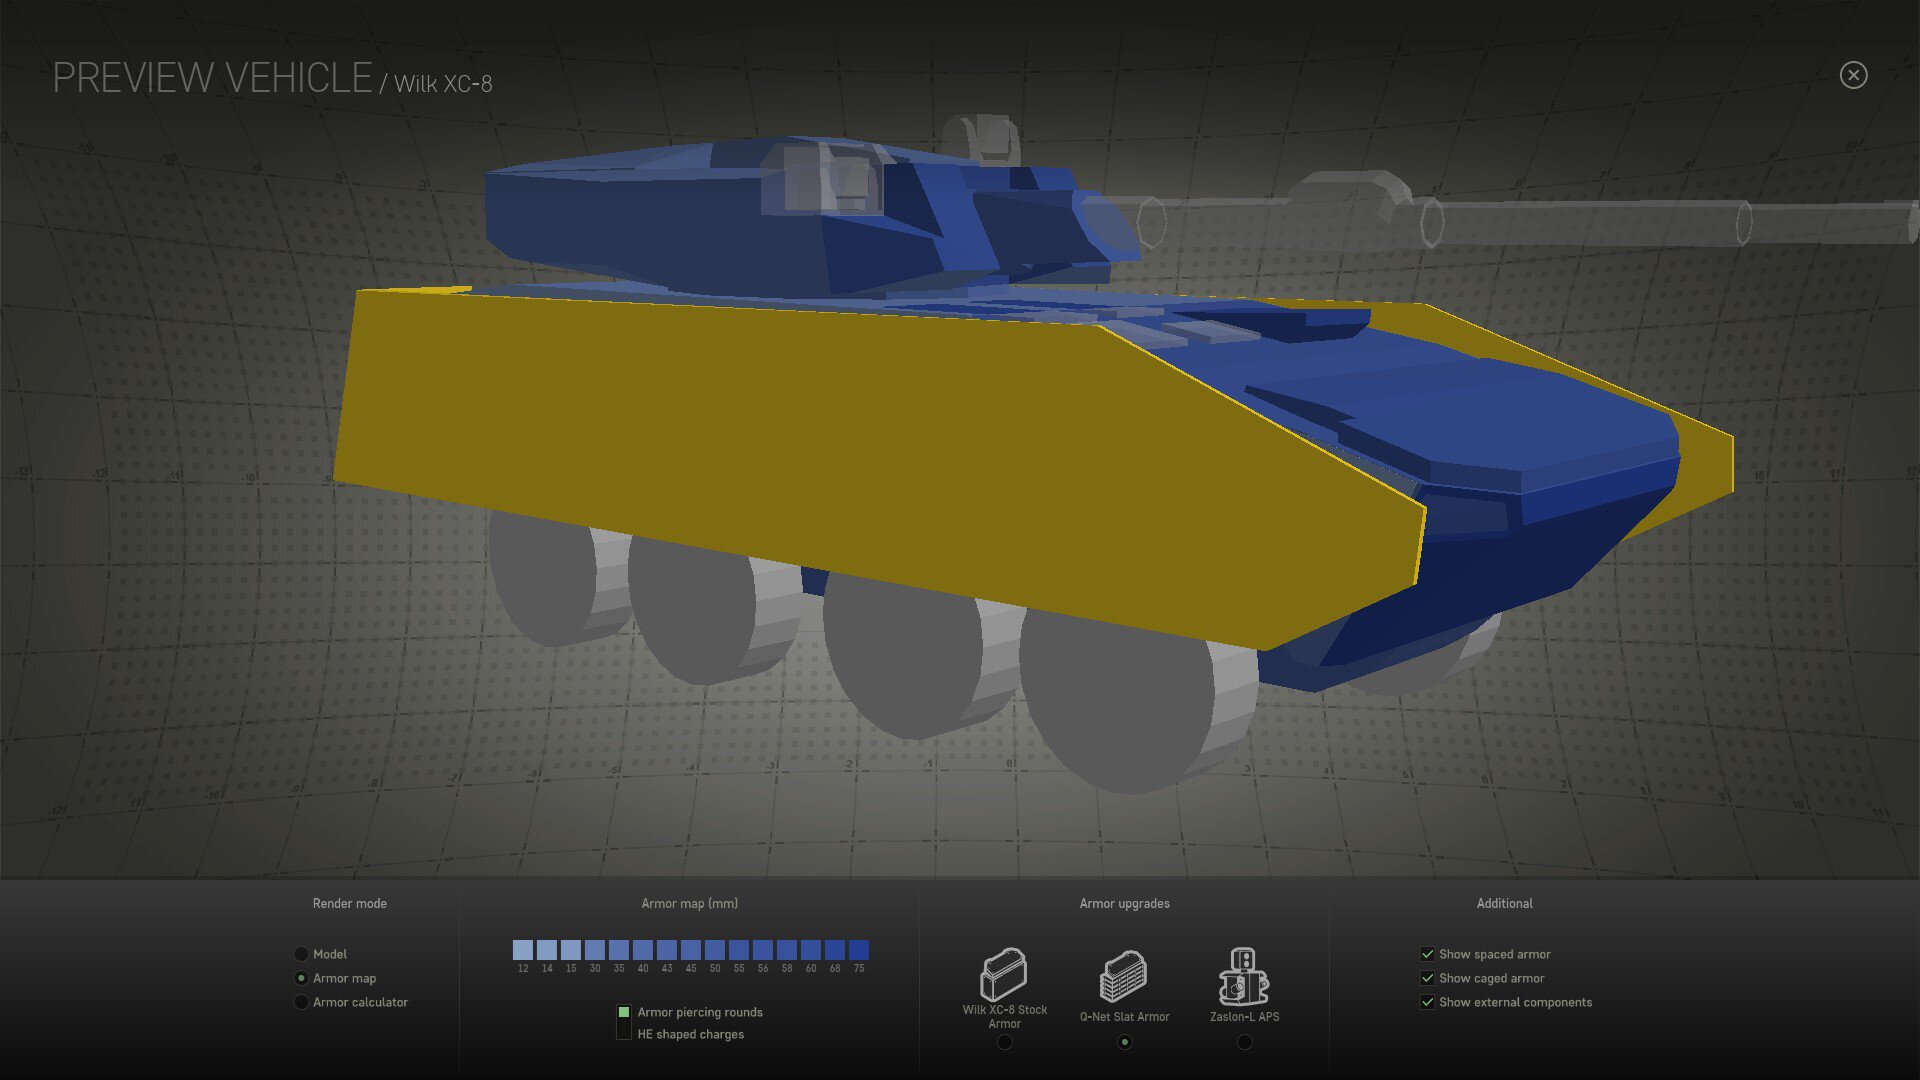
In this mode, you can enable, highlight and disable various additional armor elements such as:
- Applique armor (usually a part of an armor upgrade module)
- Cage armor (effective against HEAT and HE rounds)
- ERA (also effective against HEAT and HE rounds, even against kinetic rounds in some cases)
- External modules (these are marked white and represent various external components such as APS emitters or gun sights – no direct damage is dealt to the vehicle when you hit them, but destroying them may reduce the vehicle’s performance)
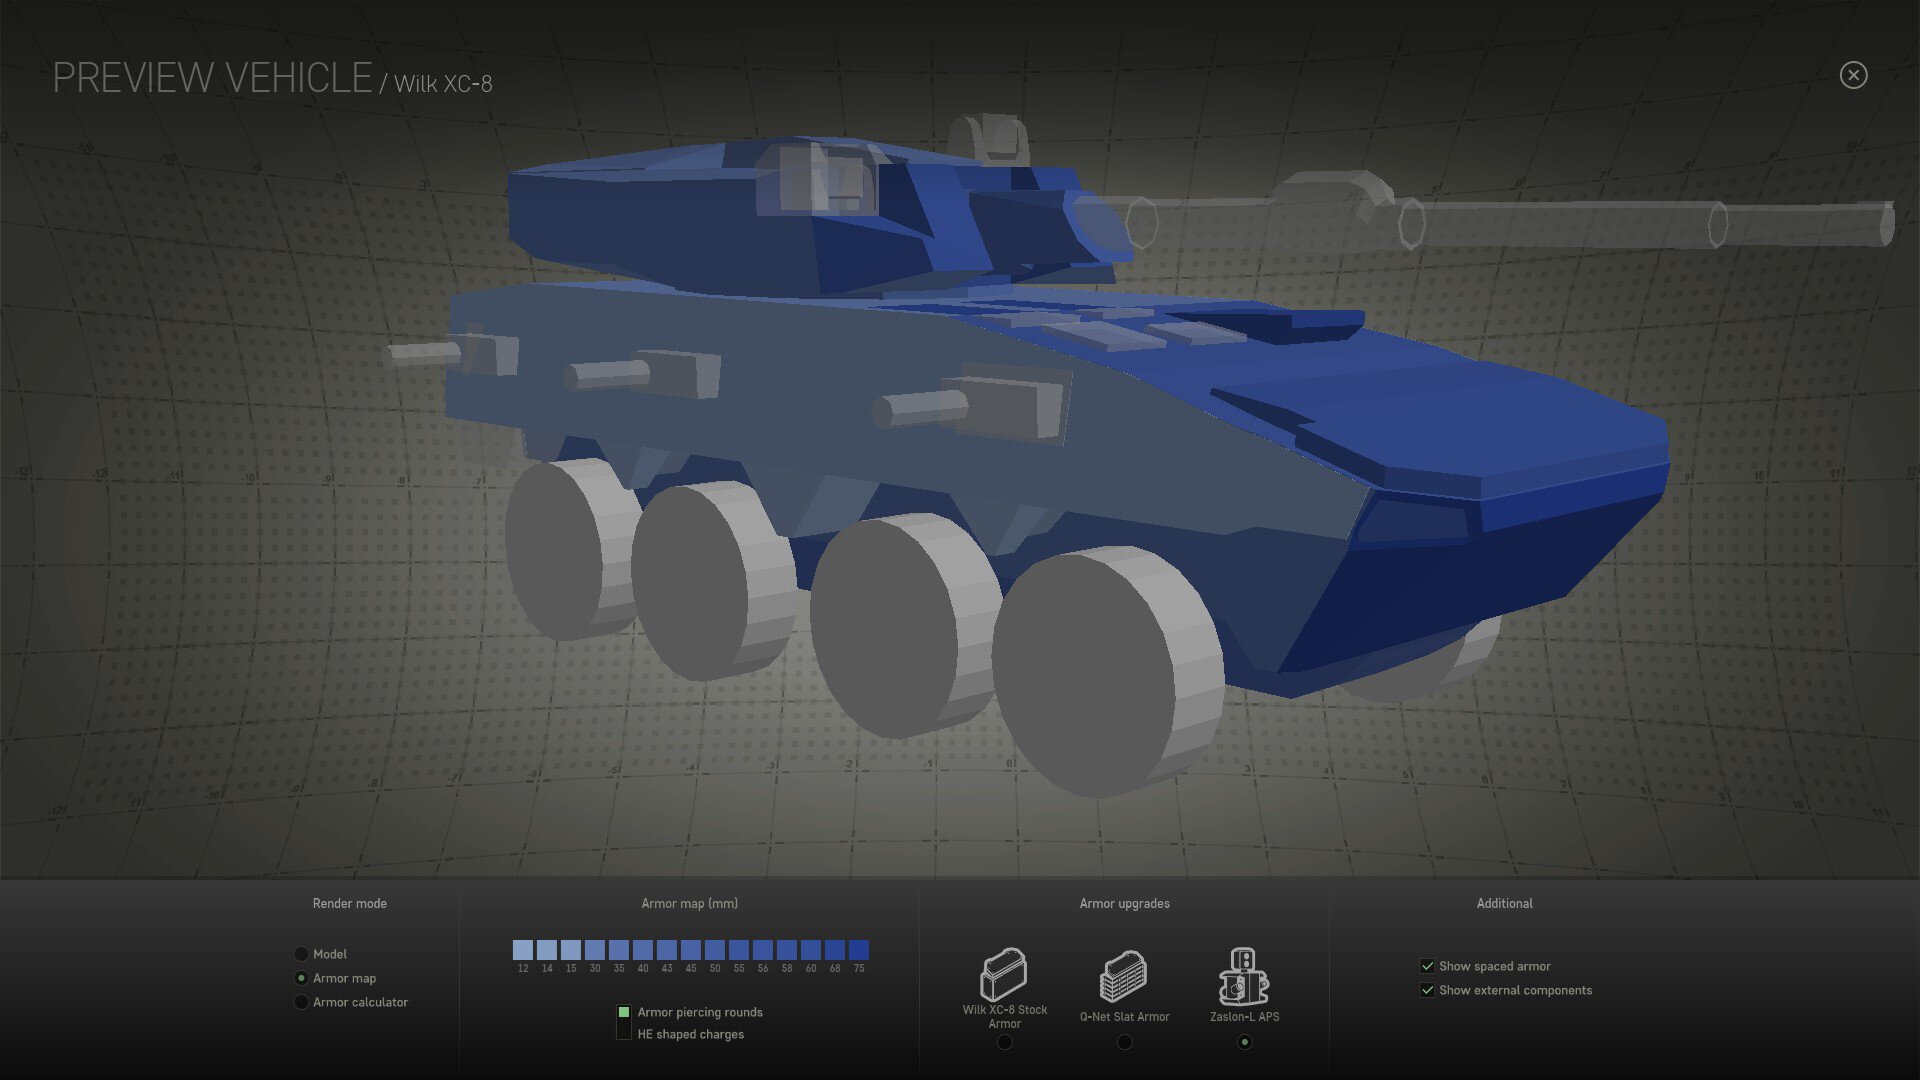
Finally, there’s the Armor Calculator mode. Simply put, it allows you to:
- Check the armor thickness under a specific angle
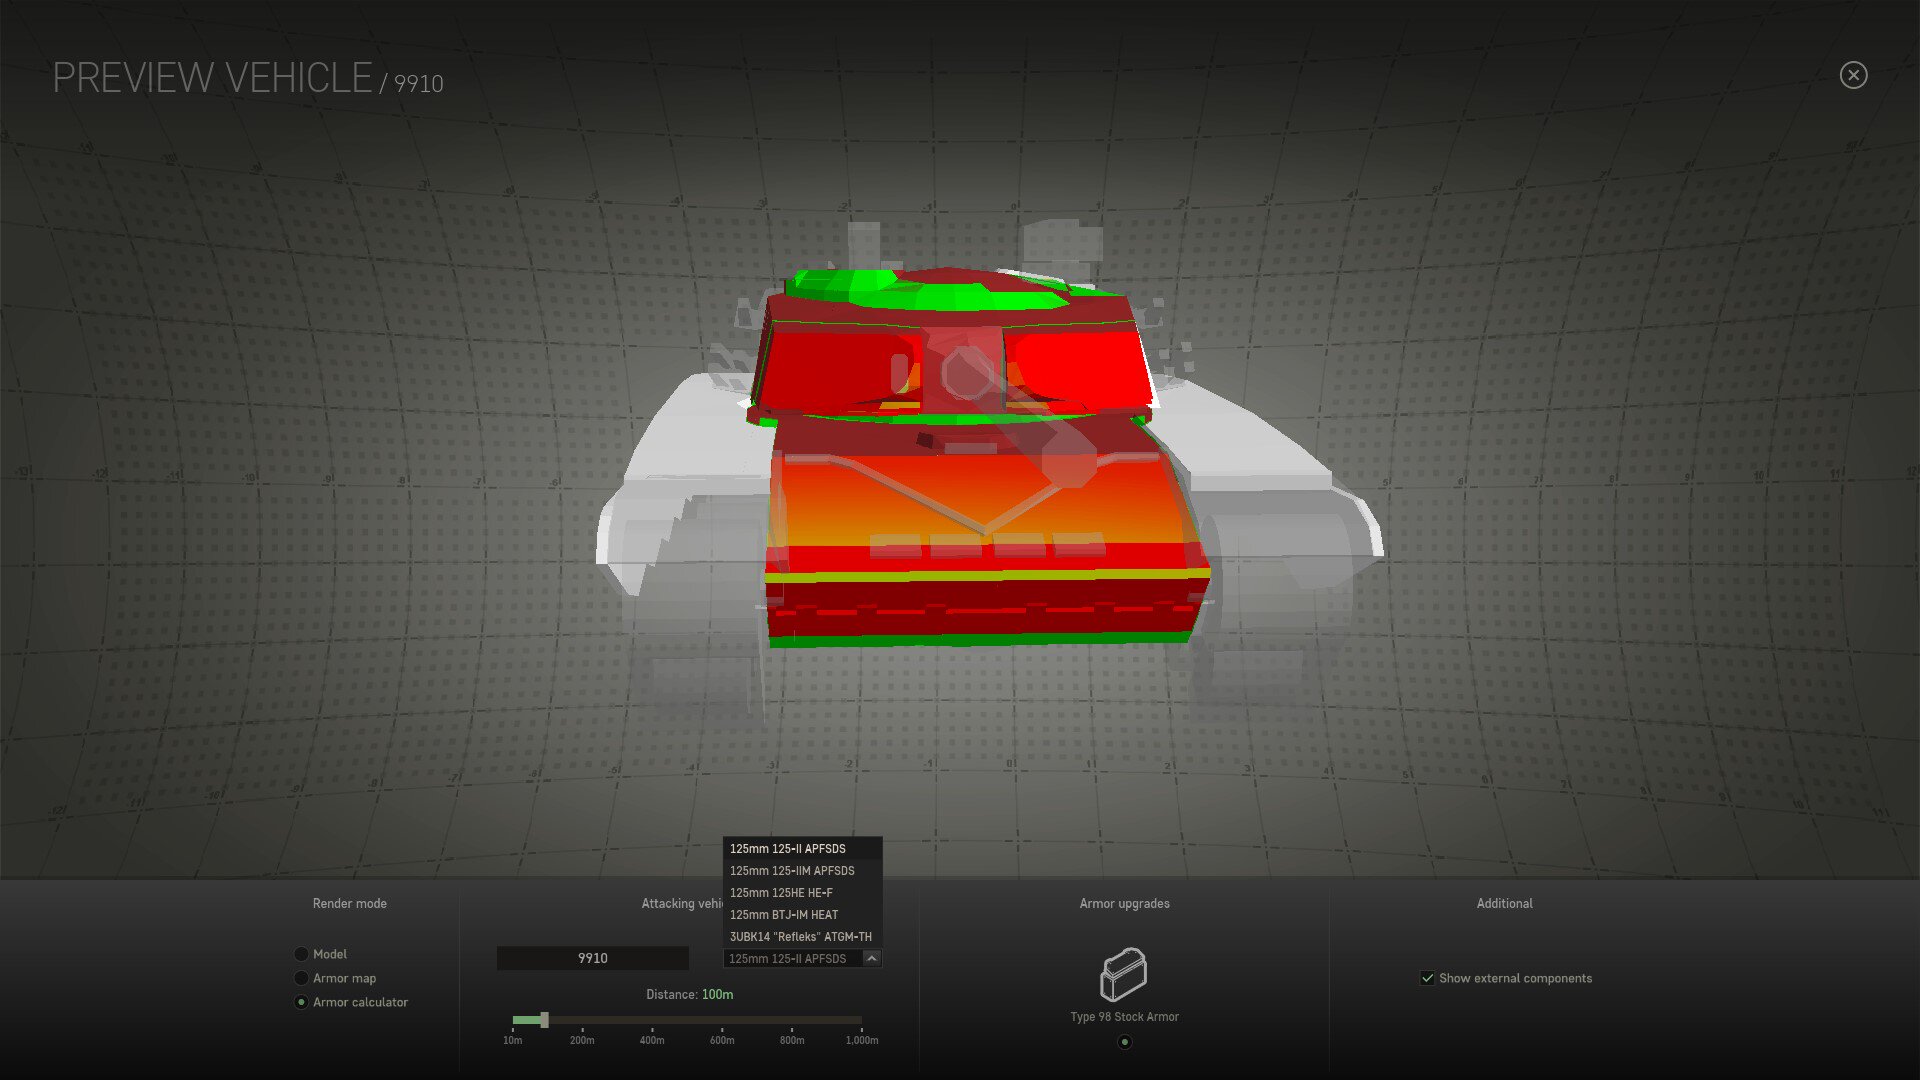
- Compare the armor of the vehicle against specific shells, set by the player at a certain distance
In other words, if you are driving, for example, an M1A2 SEP v3 Abrams and are interested in knowing where to fire at an enemy Armata in case you encounter it, you will be able to select the Abrams as your vehicle in the Armor Viewer, select which shells you want to fire, your distance – and the Armor Viewer system will show you the zones that are vulnerable under those specific parameters.
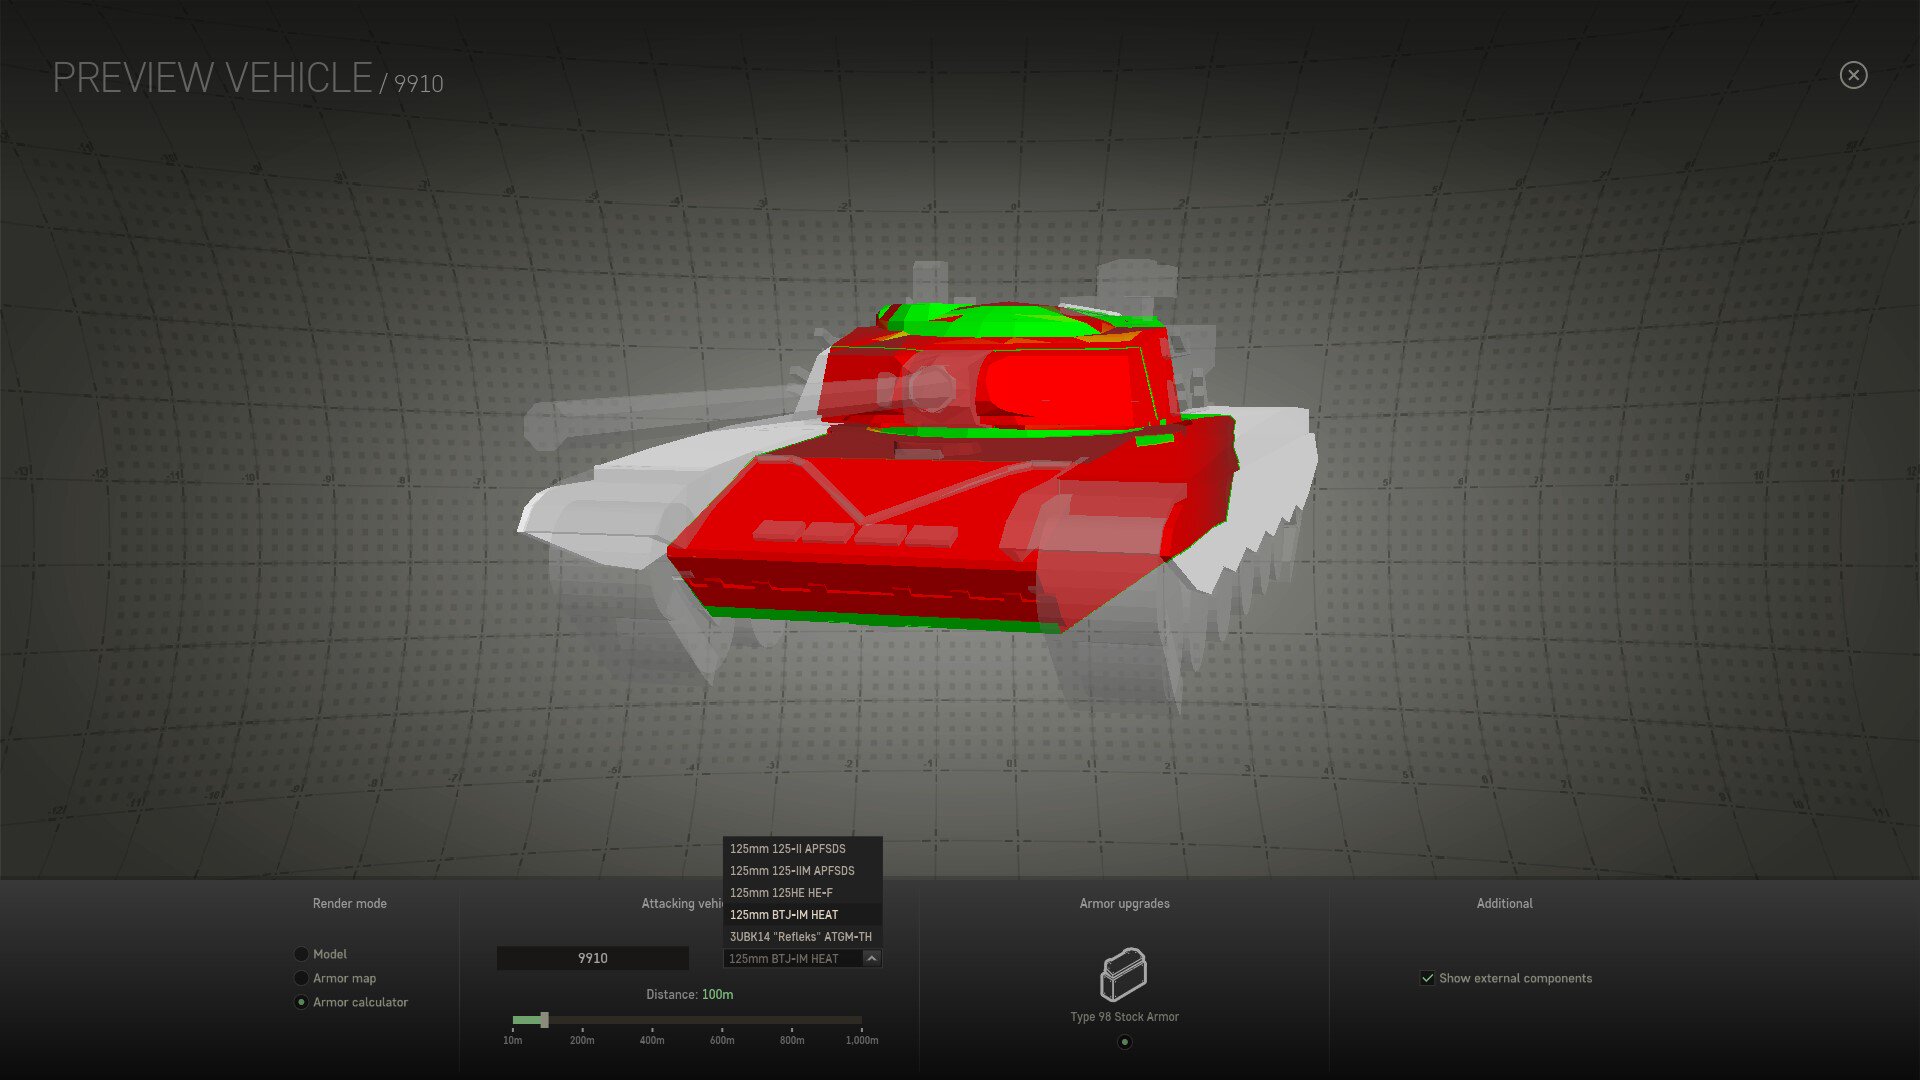
Like the penetration indicator in battle, the Armor Calculator comparison works with three basic colors:
- Green – 100% penetration chance
- Yellow – 1% to 99% penetration chance
- Red – 0% penetration chance
Additionally, areas that automatically ricochet or are impossible to penetrate for other reasons (HEAT rounds versus spaced armor for example) will also be designated.
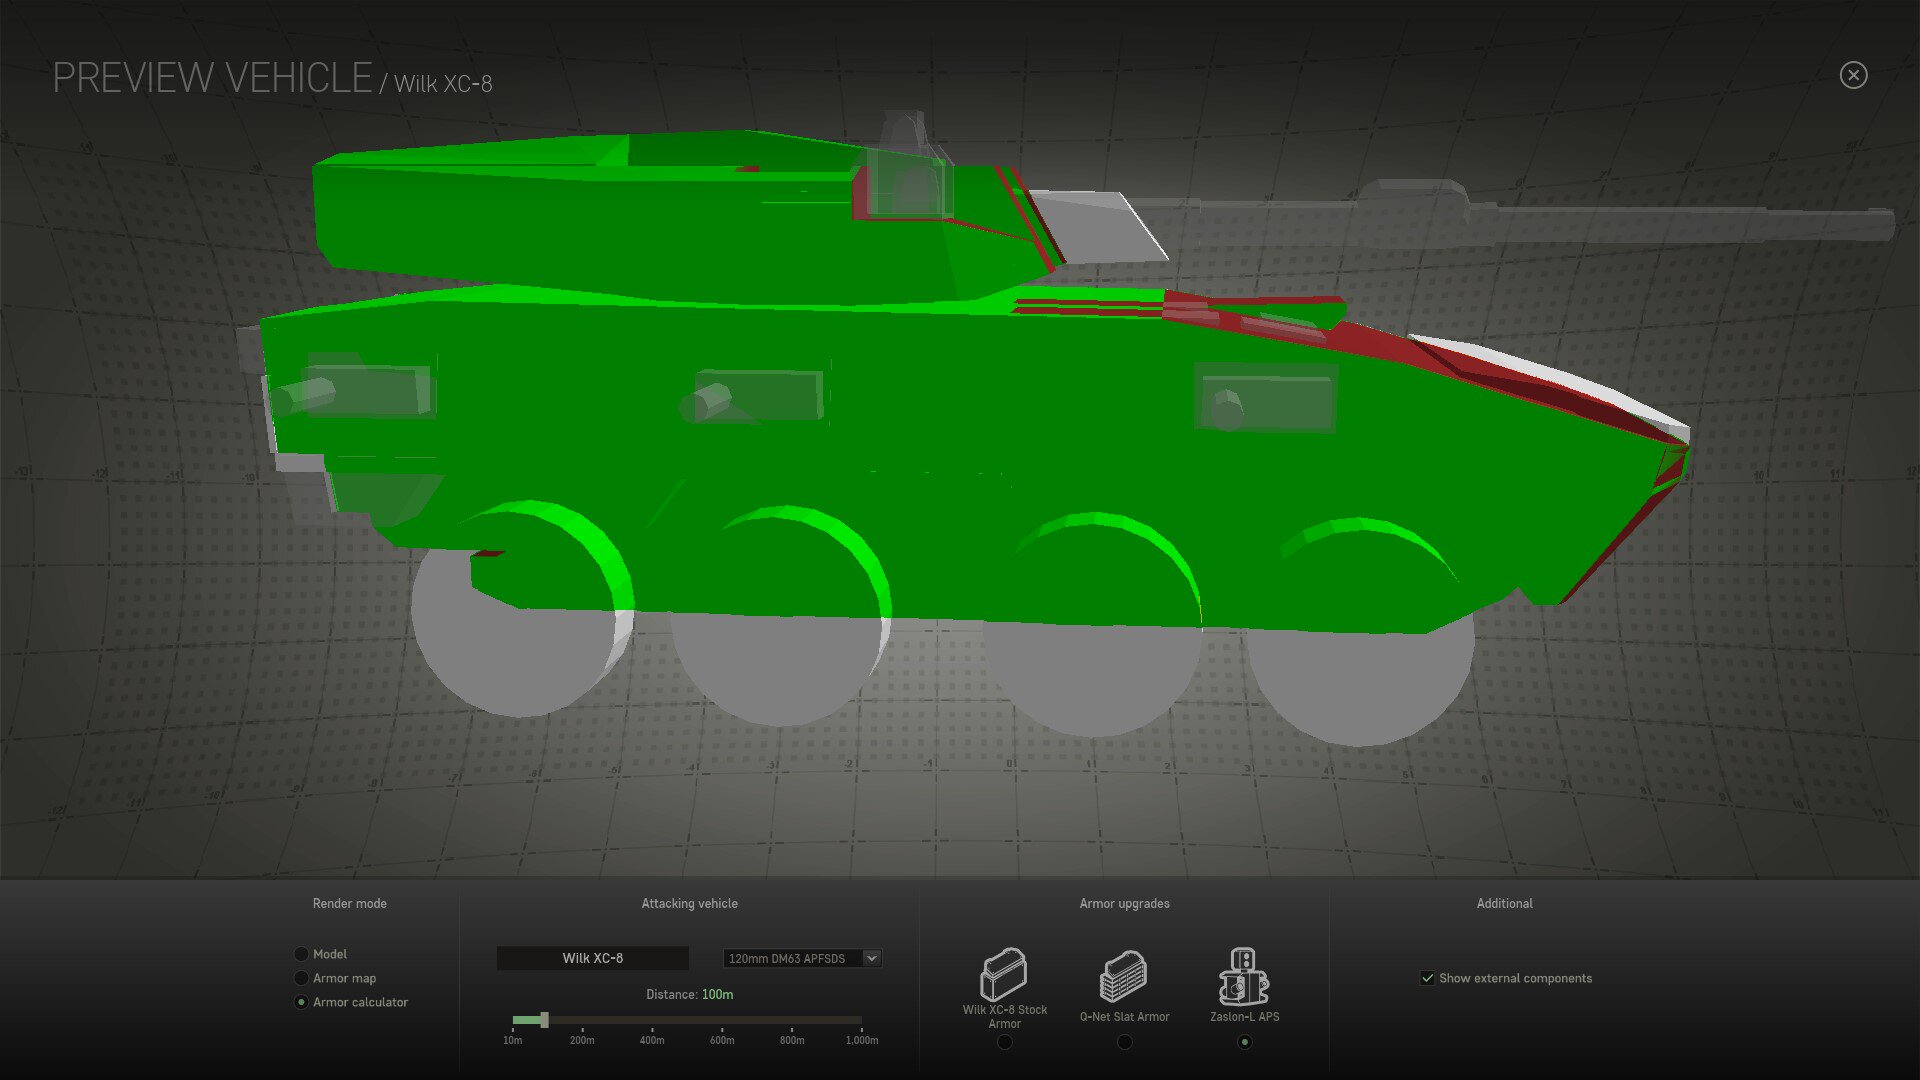
The Armor Viewer also shows other important elements that have to be considered when choosing where to fire, such as:
- The presence of ERA that, while not technically a thick armor, can effectively negate HEAT shells and missiles
- Cage armor, having, to a certain extent, the same effect
- External modules such as guns that, when damaged, do not reduce the main hitpoint count of the vehicle
- Areas taking limited damage such as unmanned turrets
- Areas taking no damage (inert modules) such as external stowage boxes
Players will be able to conveniently enable and disable these various options to produce the kind of view they desire.
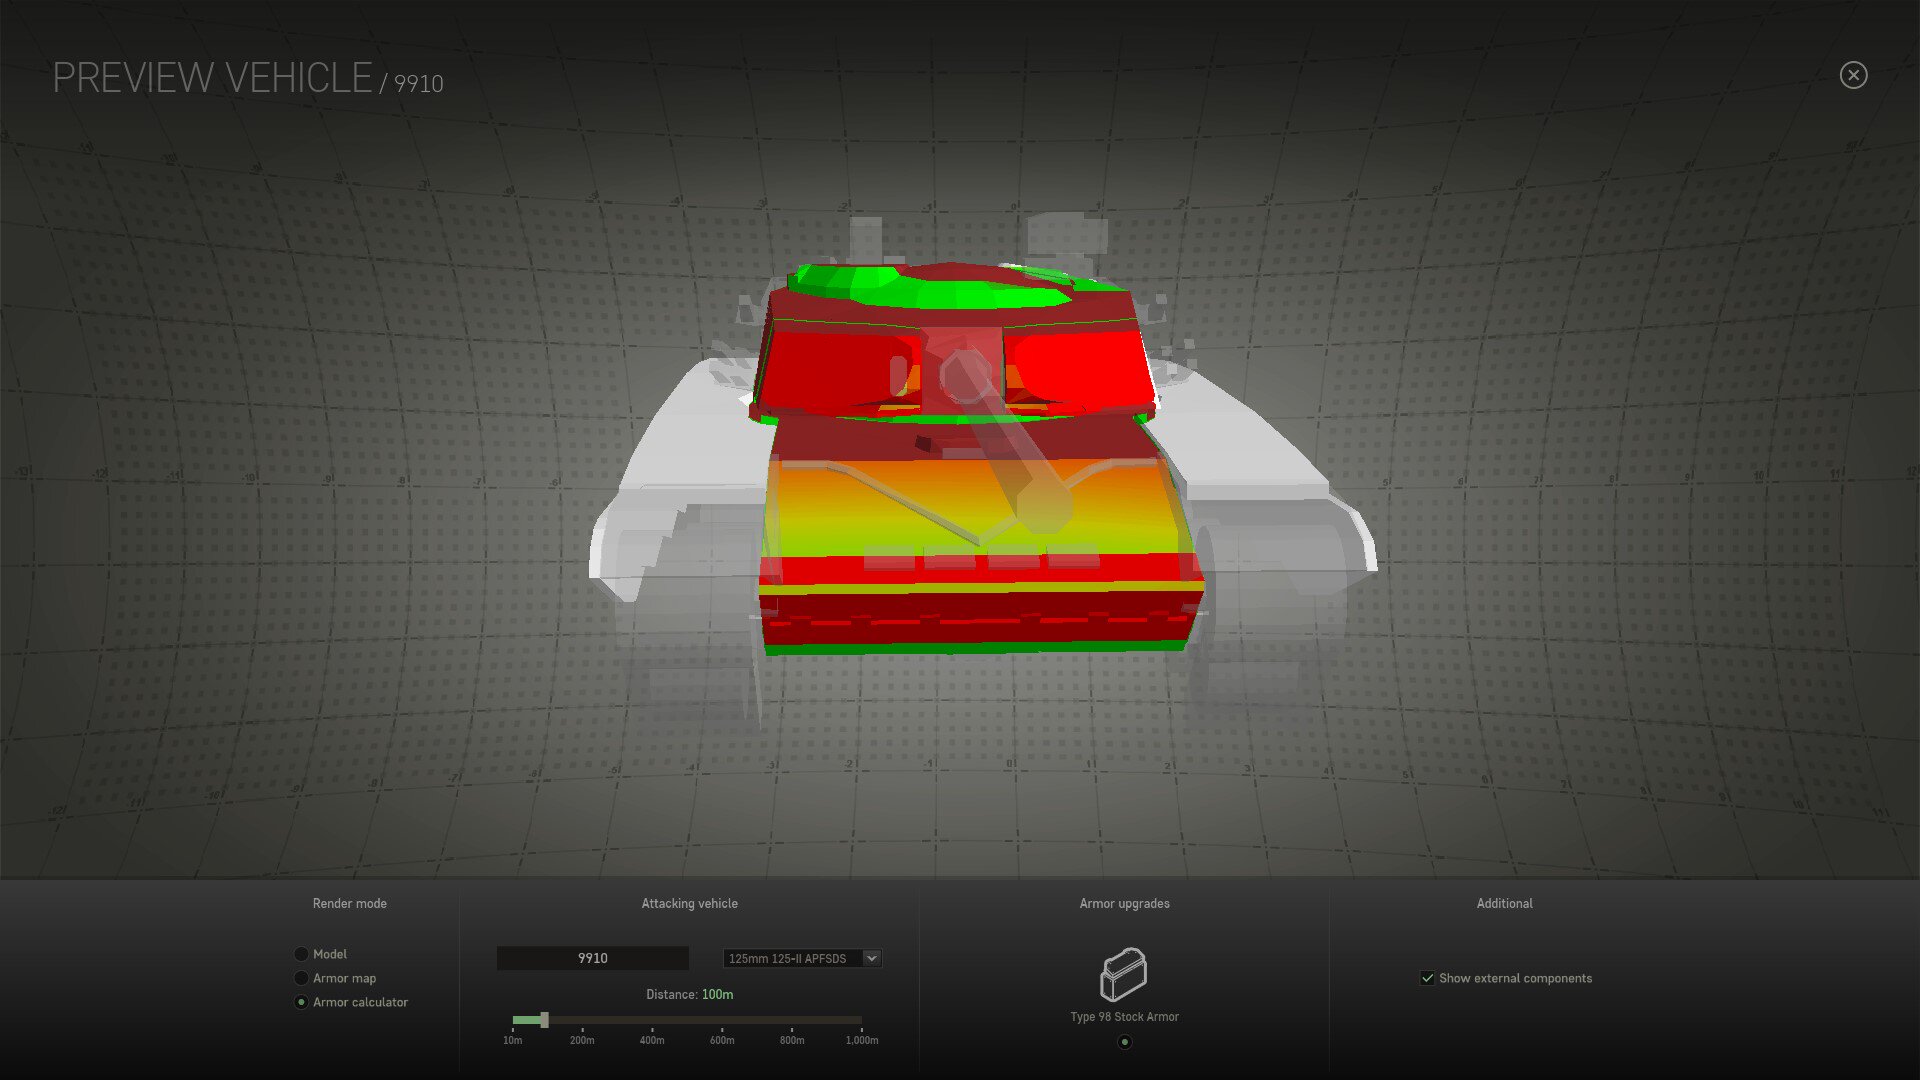
It’s worth noting that the calculation works in real time. As you rotate the vehicle in front of you the same way you’d rotate a normal model, the colors change to represent the vulnerability from your point of view.
The Armor Viewer will be coming during the Black Sea Incursion season.
We hope that this new feature will help all players understand theirs and enemy vehicles better and will see you on the battlefield!


