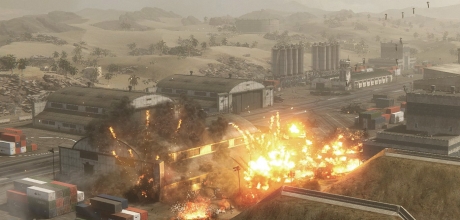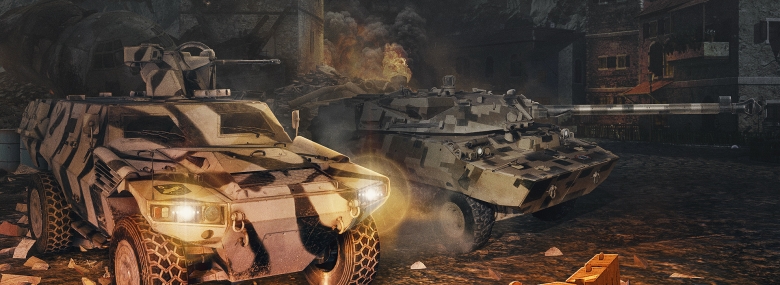
The Global Operations mode, coming in Update 0.18, represents the pinnacle of Armored Warfare PvP combat. It requires both smart tactics and a full understanding of the game, but above all excellent situational awareness is a must. This article will explore some of the basic objectives and tactics of Global Operations.
In Global Operations, two teams of 15 battle each other for control of an area. Each team has a pool of Tickets. Performing rewarded actions, such as:
- Capturing and holding objectives
- Killing enemy vehicles (20 points)
- Killing AI vehicles (10 points)
reduces the enemy team's Ticket pool. The team that loses all its Tickets first loses.
On the first Global Operations map Desert Crossing, each team starts with 2800 Tickets. Battle duration is limited to 15 minutes. Both teams are split into three groups, each starting near one of the three spawn points on the map (the cross icon).
During the battle, both teams can use their side's repair posts, marked with a crossed wrench and bullet. Use these points to repair and rearm your vehicle!
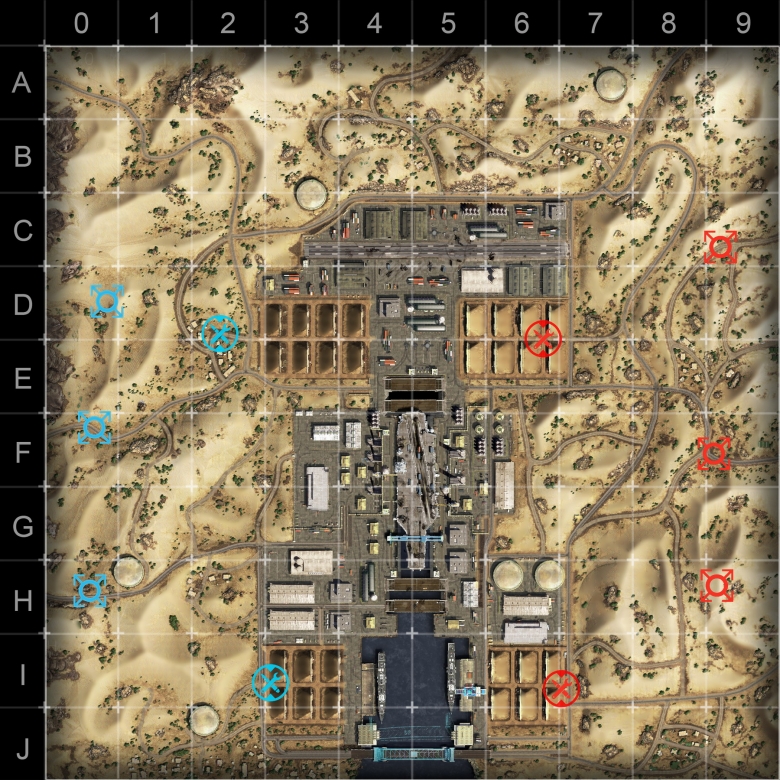
Unlike the standard PvP mode, when players get destroyed in Global Operations they can respawn on one of the three spawn points per team (north, center and south). Respawning grants you 15 seconds of invulnerability. Additionally, spawn points and repair points are protected by powerful AI bunkers. These bunkers make it impossible for the enemy team to effectively prevent respawned players from joining the battle. Please note that you can only select one vehicle for the entire battle, it is not possible to respawn in a different vehicle.
Last but not least, Wildcards appear randomly through the match. The types of Wildcards and their use will be covered in a separate article.
Phases
The battle has three Phases, the progress of which can be tracked by:
- Watching the Objective Indicators below the timer (color changes depending on the objective owner)
- Watching the Phase counter in the circle above the timer (each section of the circle represents a different phase)
The Objectives change in each Phase. The area is also littered with AI opponents, which respawn at the beginning of each Phase. Please note that the AI vehicles can also move around. Leaving an artillery teammate unprotected in the Outskirts area can result in a patrol of AI vehicles knocking them out.
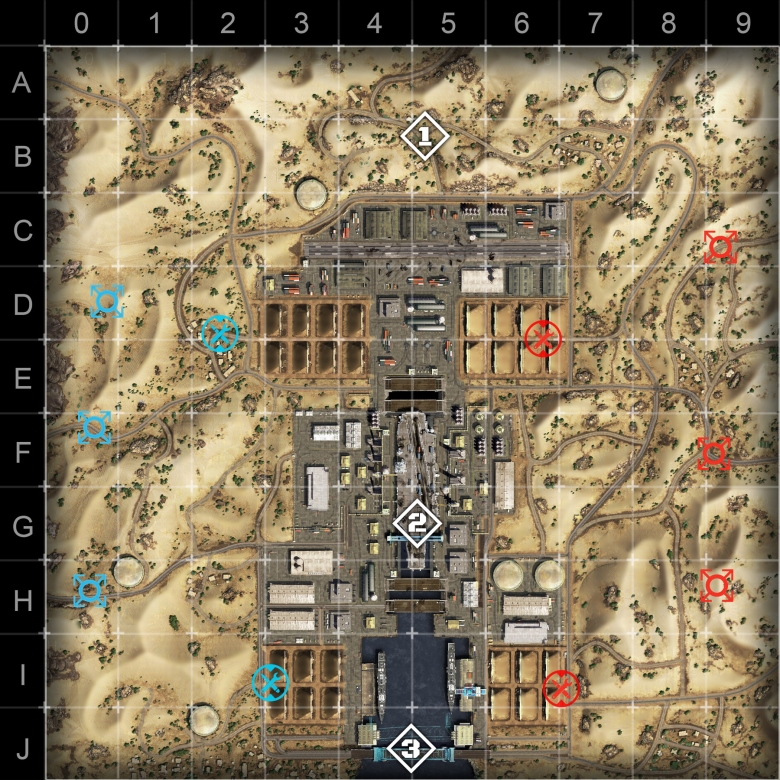
In Phase 1, the objective is to capture three strategic locations:
- Village (north, designated Objective 1)
- Carrier (center, designated Objective 2)
- Bridge (south, designated Objective 3)
Depending on the starting layout, the furthest goal will most likely be the northern village. This area is patrolled by a number of AI opponents belonging to the Tihina Division. These vehicles cannot really stop players in heavier vehicles from an objective, but they can slow them down and even seriously damage players in Light Tanks and AFVs. Going to that area alone is not advised, unless the AI opponents and the enemy team are tied up in combat with other players. The village area is rather open, but the stones and dunes offer some excellent protection against enemy fire.
The central area consists of an aircraft carrier in a dry dock with ramps allowing players to access the carrier's deck. While this objective offers an excellent vantage point to all sides, it is also extremely exposed with only several containers, crate stacks, wrecks and a few other objects on the deck providing any cover from enemy fire. Still, players, who control the carrier, can lay down suppressive fire in all directions, including the southern bridge. The carrier is the key to early success and leaving it unprotected can have catastrophic consequences. Beware also of the AI vehicles located around the carrier! It would be a grave mistake to ignore them, as they can quite easily fire into the backs of players attempting to get on the carrier deck first.
The bridge on the J line is the southernmost way of crossing the dock from east to west and vice versa as well as a Phase 1 objective. It provides some cover in the form of burning vehicle wrecks and bridge steel pillars, but pushing through this area can be difficult due to the armor required to pull it off - when two walls of steel meet head to head, there is no place for a light vehicle in between! Additionally, vehicles on the bridge can be targeted from the carrier. If they are not careful, players can get caught in crossfire and be easily destroyed.
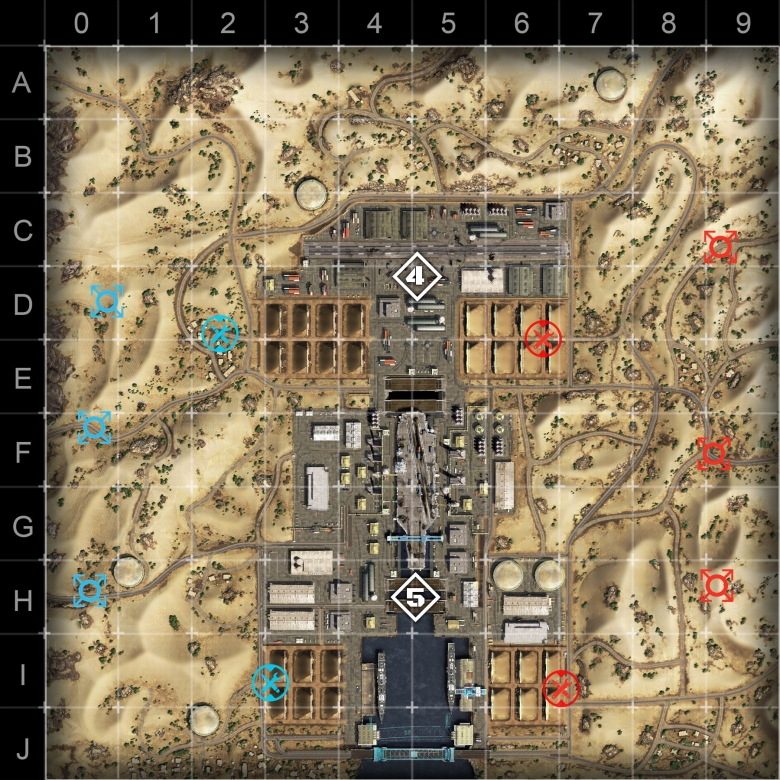
Phase 2 is activated six minutes into the battle (with 9:00 remaining on the timer). The objectives change to:
- Runway (north, designated Objective 4)
- Dry Dock Controls (south, designated Objective 5)
The Runway is the northern objective of Phase 2. As its name suggests, it is a wide and open area with some light cover in the form of vehicle and aircraft wrecks, but the runway itself is fairly open and can be attacked from practically all sides. Light vehicles can attempt to flank their heavier opponents by using the hangars and bunkers around the runway, but given the ease with which any vehicle capturing the runway can be attacked (causing a capture counter reset), players are advised to show up there in force.
The Dry Dock Controls are located on a channel crossing south of the Carrier. Like the Runway, they are exposed and only slightly less so than the northern objective – the Carrier provides line of sight cover, which means that players have to travel further south (to the G or H line) to disrupt any attempts to capture the Dry Dock Controls. Capture of the Dry Dock controls can be disrupted from the carrier deck – but only by vehicles with excellent gun depression and there is a considerable amount of danger: any player attempting to do so is risking attracting enemy fire from all directions.
While the Runway naturally attracts more player attention, the Dry Dock Controls should not be neglected. Teams are advised not to build their strategy on sneaky attempts to capture the Controls – roaming AI vehicles or even a single enemy Main Battle Tank will make short work of any CRAB or SPHINX trying to sneak their way to the objective.
The second half of Phase 2 marks the slow arrival of a massive sandstorm, which will rage throughout Phase 3.
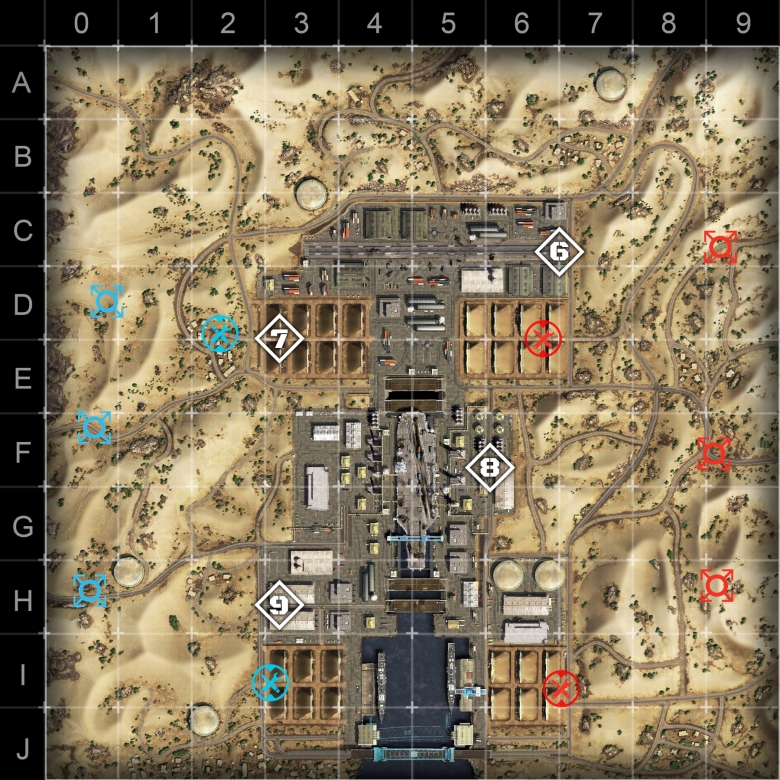
Phase 3 arrives approximately ten minutes into the battle (with 5:00 remaining on the timer) and brings two major changes to the Global Operations gameplay. First and foremost, the sandstorm now covers the entire map and reduces visibility (i.e. viewrange) by 50 percent, making many of the previous vantage points useless. Secondly, players now have four objectives:
- Hangars (north-east, designated Objective 6)
- Bunkers (north-west, designated Objective 7)
- Warehouse (south-east, designated Objective 8)
- Storage (south-west, designated Objective 9)
At this point, all objectives are located in rather enclosed areas, making team focus decisions a priority. The team with the least Tickets needs to attempt to control as many of these objectives as possible, while denying the other team the opportunity to wrestle the initiative from its hands.
The fighting ranges in Phase 3 do get considerably shorter and fast or light vehicles need to be wary of not being lured into close combat with a Main Battle Tank. AFV and Light Tank players should instead use the sandstorm as a cover from prying eyes and attempt to flank known enemy positions. A Light Tank and AFV attack from behind can be devastating even to the heaviest of MBTs.
Coordination is essential in Phase 3. Without it, the battle devolves into numerous 1 vs 1 skirmishes, the result of which is anything but certain. Players are encouraged to communicate with their colleagues to make sure their team comes out on top!
Despite their seeming complexity, the rules and tactics of Global Operations are easy to master. We hope you will enjoy this new mode and will see you on the battlefield!


